Friday, May 12, 2017

3D Printed Gift Box lid redesign

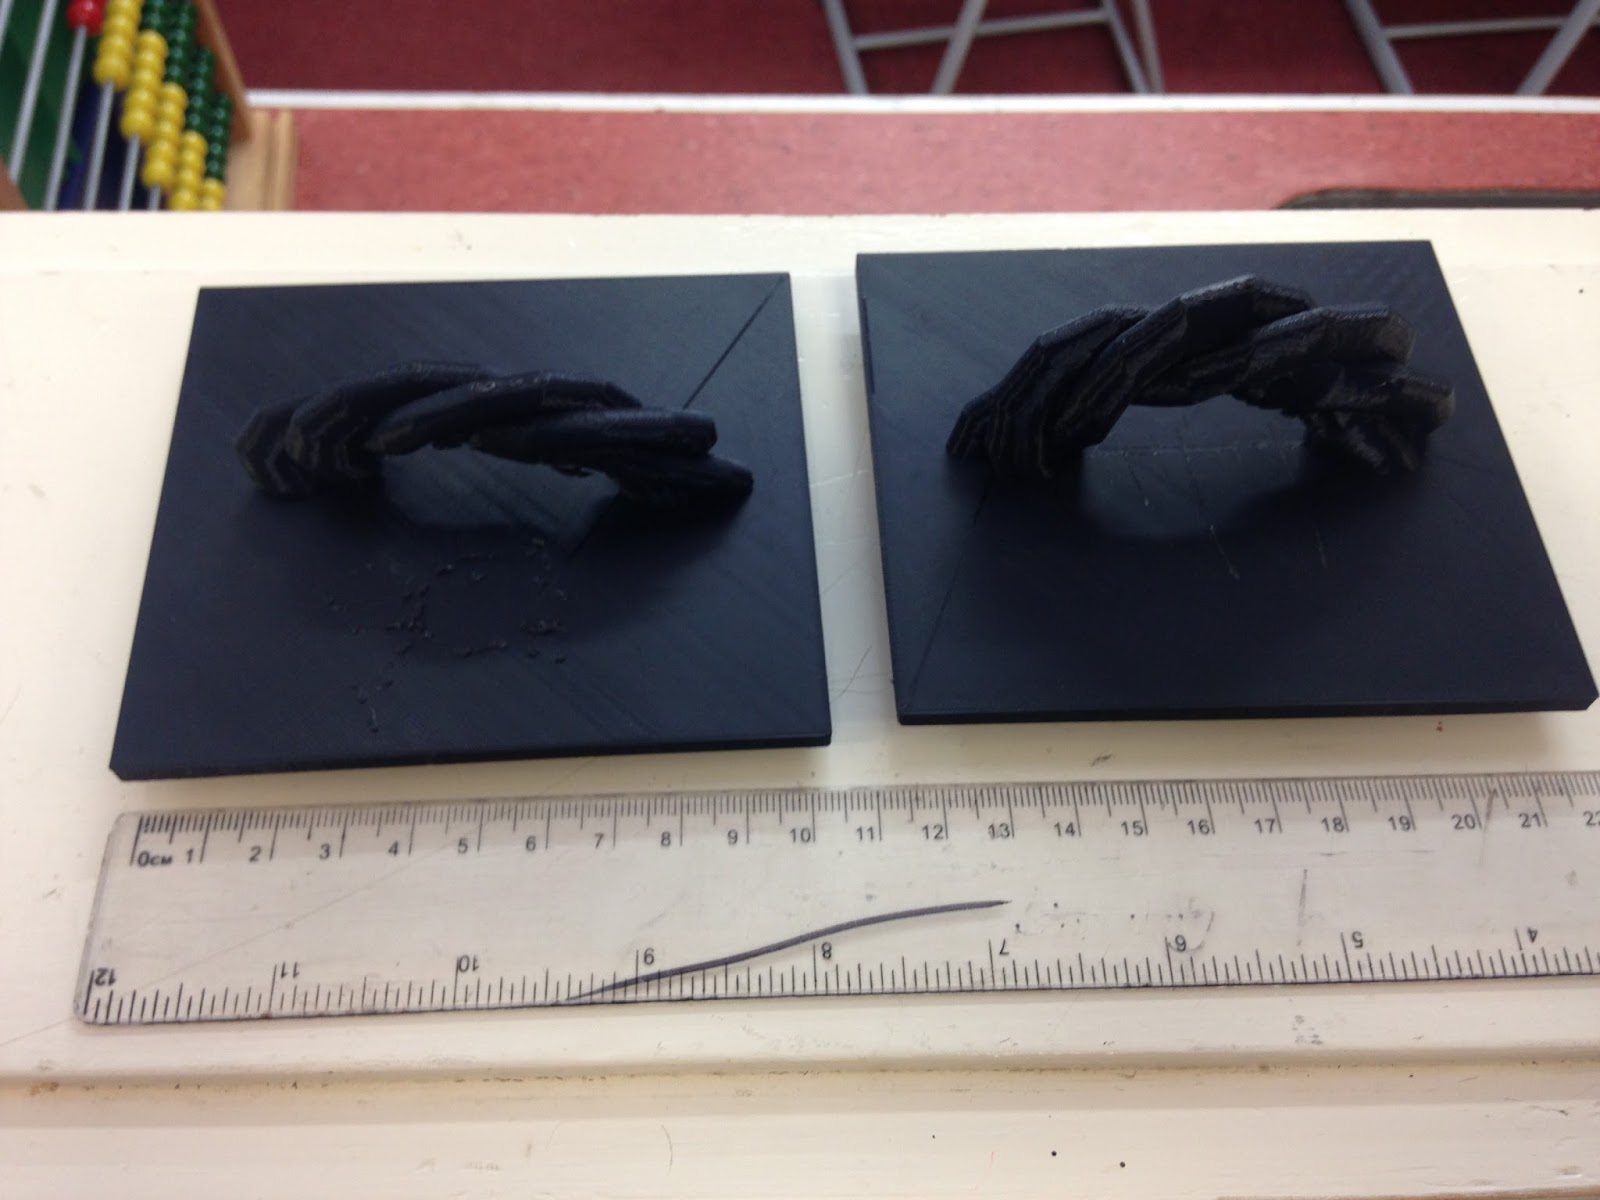
The first lid (left) and the refined improved version (right)
Challenge: Following on from the previous sequential print the student was unhappy with the quality of the lid.  He was insistent on redesigning the lid to improve the finish of the print.
Background: As noted in the previous details two aspects of the lid of the Mothers Day Gift Box had not proved successful.   The rose had been printed as part of the lid and then manually removed - which left residual filament on the lid.   The handle for the box detatched when the print was lifted, the lid was increased in size and sunk deeper into the lid to provide more strength and stability.
Level of difficulty: Low the student had got significantly close with the first print, and was given the option of using this lid in the final version.  He wanted to improve its design and was
therefore making adjustments to the print instead of designing a new lid.
Size: 10cm by 10cm to a depth of 5mm.
Timeframe: Seven hours.
Issues: Non - the two probelm areas were successfully addressed.
Process: Tinkercad/Cura, refining of already created work.'
What we would do differently: The student (Y5/9 YO) was driving the design and the process.  He was the one who wanted to reprint and we were happy to allow him to do so, on the basis that he had created an original idea - this should allow a student to move onto greater things in the future and should also be put in the context of the student creating his first challenging print and doing so in his own time to completed the project.

Thursday, May 11, 2017

3D Printed Gift Box

Above: Completed in two stages - gift box with lid
Challenge: Student given free range to create an original design piece from scratch.
Background: This student had produced a name plate, was then looking for an additional challenge to really stretch himself.  He came upon the idea of producing a gift box for either Mothers Day (which is this weekend) or for his mothers birthday (if the timeframe would prevent it from being ready).  The student is a nine year old student who was experiencing an opportunity to use the 3D Printer for the first time.
Level of Difficulty: High - this was a challenging print in multiple stages involving significant planning.
Size: The print was constructed in two significant pieces.  The box itself had a 10cm base and width and depth of 10cm.  The lid was 9.5cm by 9.5cm with a depth of 5mm.  This allowed it to fit into the box itself.
Above: Box with interior visible
Timeframe: Box - ten hours.   The lid was initially eight hours and then seven hours with the reprint.
Issues: The lid initially had two aspects to it, the handle pictured above and a rose next to it.  The rose did not print successfully and was removed (as seen by the filament on the lid above).  The handle was removed as a result of printing and detatched the first time it was picked up.  The box itself held a number of objects that were built into the sides of it 'Mum' and a heart on the other three sides.  The box contained considerable rafting to allow it to be layered which had to be removed.  The finish was not perfect on the base when the rafting was removed, but this required some basic sanding and the use of a craft knife.  As a result a repeat print was made of the lid, with the second version having a removal of the rose.
Above: Lid seperate with handle visible
Process: Initial design was created in Tinkercad.  The design was then passed between three students, the one with the original design and then two who contributed tweaks and details to the completed project.
What we would do differently: Not a lot this is an example of a student really pushing himself with his 3D design in creating an intricate project that had parts that related to each other.  The student refined his idea repeatedly to include significant detail and produce an outstanding 3D Print.

Tuesday, May 9, 2017

3D Printed iPad Stand - Delux

Above: iPad stand Mark Two
Challenge: To improve the design of the student created iPad stand.
Background: This was a follow up print to one previously designed by the student.  The student had created it independently but as a result of feedback was asked to personalise the stand and also this about providing extra support for the stand by the addition of a bracket at the back.
Above: Brace at back clearly visible
Level of Difficulty: Medium - the original print was a success but the challenge was to add value or additional features to a print that had already been successful.
Size: As previously stated, 80mmx 70mmx 60mm.
Timeframe: Eight hours with the addition of the brace and personalisation of the name, a two hour increase on the original.
Issues: the rafting provided by Cura 2 software was difficult to remove perfectly from the base.
Process: All additional changes to design were carried out by using Tinkercad and then imported again into Cura 2.
What we would do differently: Nothing.  This is a considerable improvement on the original design (which also worked fine) as a display piece and a conversation piece about 3D Printing this is an excellent example of something positive and there is clear progression for the student from his first original design (name plate) to create something with an expressed purpose.

Sunday, May 7, 2017

Beginners Guide to 3D Printing

Above: Students 'heart' design
Challenge: Starter for the students to use the 3D Printer in a creative way.  Students were shown Tinkercad and encouraged to come up with a design of thier own choosing independently.
Background: It was the first time the student had used the 3D Printer as the New Zealand school year runs February to December, by this stage (May) some students had not taken an opportunity to use the 3D Printers so they were encouraged to do so. (the machines had been serviced and were previously not available).
Level of Difficulty: Low - student had not previously had any experience with Tinkercad or 3D Printing and this was produced by the student in under five minutes.
Issues: None - student was extremely pleased with the process and the opportunity to produce a novelty item in a short time.
Size: As shown in the photograph - three cm in length.
Timeframe: Thirty minutes.
Process: Tinkercad default used, with the new interface there are a number of objects that are able to be produced instantly, the heart being one of them.  With this produced the only other detail was the hole that was put into the centre (so it could be used as a necklace).  
What would be done differently: This was a positive experience an a relatively straightforward print with an extremely short print time.  Using this format as an introductory lesson or creation process it would be possible to produce an entire classroom worth of design in a short period of time and be able to print on a single printer during a short two or three day period.  The other consideration is due to the print time the students saw the machine operating from start to finish in the classroom.  

Saturday, May 6, 2017

3D Printed iPad Stand

Challenge: Once the name plates were completed the students were encouraged to come up with an original design that served a practical purpose, something that they could use.  They were give
As shown from above the completed print
n free reign to come up with any design however the printing of designs was dependant on a filtering process.  Students worked on design in thier own time.
Background: This was a progression from the 'name plate' as mentioned above.  The student wanted to create a stand to hold his iPad in the classroom so it would stand up.
Level of Difficulty: Low-Medium - this task was dependant on the student creating a stand that would would and needed preparation and measurement to ensure that it worked successfully.
Issues: None - this print worked perfectly, however on discussions there were ideas to personalise it (including the students name as a plate on the front) and strengthen the back of it.   It is robust but including a back rod or brace built into the design would allow pressure to be applied to it.  Student was thrilled with result and the project created a buzz with the creator and the other students in the classroom.
Above: The completed print in use
Size: As shown in the photographs a width of 80mm a height of 70mm and 60mm across.  These would probably be the minimum print sizes for the iPad holder to serve its purpose.
Timeframe: Six hours with an Ultimaker 2+ on regular print setting.
Process: The student has shown a desire and creativity to come up with ideas independently of teacher input.  By allowing a print run of an independent project the idea is to encourage the student (who is nine years old) to continue to think of practical applications and uses for the 3D Printer.  Tinkercad was used for the students design, and then the file was converted into Cura.   The print was then completed on an Ultimaker 2+.   (All prints on this site from this point forward unless otherwise mentioned will now follow this process as all machines at our school are now upgraded to Ultimaker 2+ with the newer version of the (free) Cura Software.  We are also using standard print settings and regular filament unless otherwise specified.  The student is already re-designing this print based on feedback given to include his name to personalise it and a brace that will sit at the back of the stand.